Mongolian barbecue sauce is one of those versatile, flavor-packed sauces that instantly transforms a simple dish into something special. With its perfect balance of sweetness, savoriness, and a subtle kick of spice, it’s a favorite in Asian-inspired cooking. Whether you’re making stir-fries, dipping egg rolls, or glazing chicken, this sauce elevates every bite.

What makes this recipe stand out is how quickly it comes together with pantry-friendly ingredients like soy sauce, brown sugar, garlic, and ginger. With just a few minutes on the stove, you’ll have a thick, glossy sauce that tastes better than takeout.
If you’ve ever wanted to recreate that restaurant-style Mongolian flavor at home, this recipe is your go-to. It’s fast, budget-friendly, and guaranteed to impress.
Why You’ll Love Mongolian Barbecue Sauce
When I first tried making this Mongolian barbecue sauce, I was surprised at how effortless it was. I expected a long list of ingredients, but it only required a handful of simple staples I already had in my kitchen.
As the sauce simmered, the aroma of garlic and ginger filled the air, making me eager to taste it. The rich combination of soy and brown sugar created a glossy, velvety texture that clung perfectly to chicken pieces and vegetables.
The best part was using it as a dipping sauce for egg rolls later that evening. It felt like enjoying restaurant-quality food, but right at home and honestly, it tasted even better.
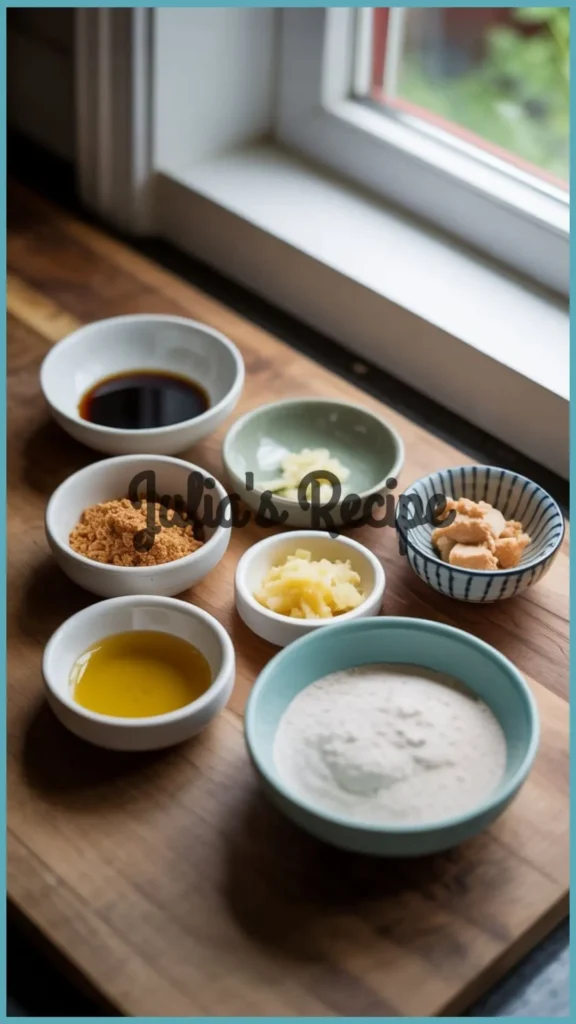
Ingredients Required for Mongolian Barbecue Sauce Recipe
Before you start, make sure you have all the following ingredients listed below for this Mongolian Barbecue Sauce Recipe
- ½ cup light soy sauce
- ½ cup dark brown sugar
- 2 cloves garlic, minced
- 1 tbsp fresh ginger, grated
- 2 tbsp olive oil
- 2 tbsp all-purpose flour (mixed with water to form a slurry)
- 1 cup water (adjust as needed)
Kitchen Equipment Needed
- Medium saucepan or pot
- Mixing bowl
- Whisk
- Measuring cups and spoons
Prep Time: 5 minutes
Cook Time: 10 minutes
Total Time: 15 minutes
How To Make Mongolian Barbecue Sauce
Just follow these easy steps to make your own Mongolian Barbecue Sauce at home
1. Heat the oil: Begin by placing a medium saucepan over medium-high heat and add the olive oil. Allow it to warm until hot but not smoking. This creates the perfect base for developing flavor.
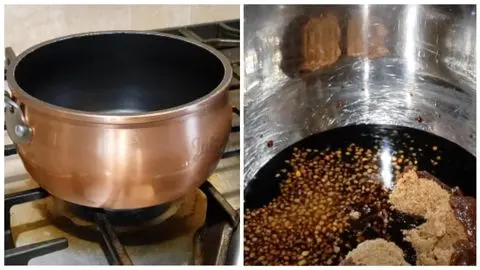
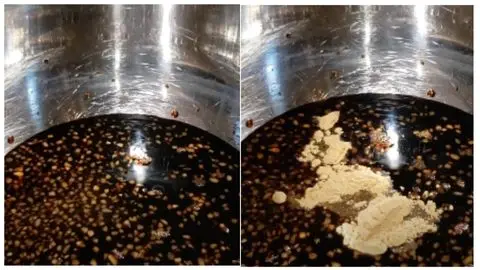
2. Mix the base ingredients: In a separate mixing bowl, whisk together the light soy sauce, dark brown sugar, minced garlic, and grated ginger. Make sure the sugar begins to dissolve so that the flavors are evenly combined.
3. Prepare the thickener: In a small bowl, stir together flour and a little water to form a smooth slurry with no lumps. This will help the sauce thicken and create that signature glossy texture.
4. Combine in the saucepan: Pour the soy mixture into the hot saucepan and stir well. Add the flour slurry and half of the water, whisking constantly to prevent clumps and ensure everything is fully incorporated.
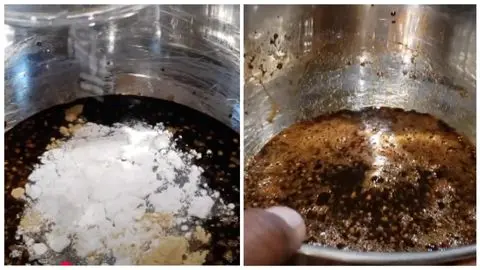
5. Adjust with more water: As the sauce begins to bubble and thicken, gradually add the remaining water until you reach your desired consistency. Keep whisking so the sauce stays smooth.
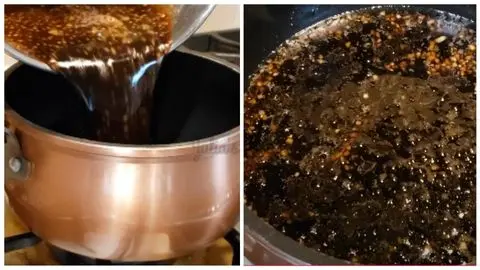
6. Simmer and finish: Reduce the heat to low and let the sauce simmer gently for 3–5 minutes. Stir occasionally until it reaches a rich, glossy texture. Remove from the heat and serve hot with chicken, beef, vegetables, or as a dipping sauce for egg rolls.
How to Store Mongolian Barbecue Sauce Properly?
Allow the sauce to cool completely before transferring it to an airtight container. Store in the refrigerator for up to 5 days. To reheat, warm gently on the stovetop or microwave, adding a splash of water if needed to loosen the texture.
What to Pair and Serve with Mongolian Barbecue Sauce
1. Drizzled over stir-fried chicken
One of our favorite ways is tossing crispy chicken bites in this sauce. The glossy coating makes every piece irresistible.
2. Paired with beef and veggies
We tried it with thinly sliced beef and mixed vegetables, and it honestly felt like a restaurant-style Mongolian beef dish.
3. As a dipping sauce for egg rolls
Trust us, dipping hot, crunchy egg rolls into this sauce is addictive. We ended up finishing the batch way too quickly.
4. Brushed on grilled shrimp
One time, we brushed this sauce over grilled shrimp skewers, and it gave them the most amazing sweet-savory glaze.
5. Tossed with noodles
We’ve mixed it with stir-fried noodles before, and it turned into a quick, flavorful meal that tasted better than takeout.
6. On crispy tofu cubes
For a vegetarian twist, we coated pan-fried tofu in this sauce, and even the meat-lovers in our family couldn’t stop eating it.
7. Glazed over meatballs
We once made cocktail-style meatballs and tossed them in the sauce it became the star appetizer of the night.
8. With fried rice
Stirring a spoonful into fried rice gave it an instant upgrade, making a simple dish bold and flavorful.
9. As a burger topping
We spread a little over beef patties, and it added a unique Asian-inspired twist to classic burgers.
10. On roasted vegetables
Drizzling it over roasted carrots and broccoli gave us a new favorite side dish it made the veggies disappear fast!
My Personal Experience With this Recipe and Some Tips
1. Don’t rush the oil
Let the oil get hot before you add anything. Warm oil makes the flavors come out better.
2. Mix the sugar well
Stir the brown sugar until it melts into the soy sauce. This makes the sauce smooth and sweet.
3. Chop garlic tiny
Mince the garlic small so it blends right in and you don’t get big bites of it.
4. Use fresh ginger
Fresh ginger makes the sauce taste brighter. Grate it fine so it mixes easy.
5. Make the flour smooth
When you mix flour with water, whisk until there are no lumps. That way, your sauce won’t be clumpy.
6. Add water slowly
Pour the water a little at a time. This helps you control how thick or thin the sauce gets.
7. Keep stirring
Stir the sauce often so it doesn’t stick to the pot or burn at the bottom.
8. Lower the heat to simmer
Once the sauce starts to bubble, turn the heat down. This lets it thicken gently.
9. Taste and adjust
Try a little spoonful before finishing. Add more soy if it’s too sweet or more sugar if it’s too salty.
10. Let it rest
Give the sauce a minute to cool before using. It gets even thicker as it sits!
FAQs on Mongolian Barbecue Sauce Recipe
Here are some common questions I’ve got you covered about the Mongolian Barbecue Sauce Recipe.
1. Can I make this sauce ahead of time?
Yes! We often make it a day early, and it tastes even better after sitting in the fridge overnight. The flavors blend beautifully.
2. How long does it last in the fridge?
From our experience, it stays fresh for about 4–5 days in an airtight container. We always reheat it gently with a splash of water.
3. Can I freeze Mongolian barbecue sauce?
We’ve tried freezing it, and it works fine. Just thaw overnight in the fridge and warm it slowly on the stove.
4. What can I use instead of flour?
Sometimes we use cornstarch instead of flour. It makes the sauce a bit smoother and thickens faster.
5. Is this sauce spicy?
Not really it’s more sweet and savory. But when we want a kick, we add a little chili flakes or sriracha.
6. Can I make it gluten-free?
Yes! We swap the soy sauce with tamari or coconut aminos. It tastes just as good, maybe even better.
7. What’s the best way to reheat it?
We usually warm it on the stove over low heat. If it feels too thick, a spoonful of water fixes it right up.
8. Can I double the recipe?
Absolutely. We’ve doubled it for parties, and it turns out great. Just use a bigger pot and stir well.
9. What dishes does it go best with?
We’ve loved it on chicken, beef stir-fry, noodles, fried rice, and even as a dip for egg rolls. It’s very flexible.
10. Can I make it less sweet?
Yes. Sometimes we cut the brown sugar a little or add extra soy sauce. We’ve found it’s easy to adjust to taste.
This homemade Mongolian barbecue sauce recipe proves that bold flavors don’t need complicated steps. With just a few ingredients, you can prepare a delicious sauce that complements countless dishes.
I’d love to hear your thoughts-leave a comment on the blog and let me know How it came out! Don’t forget to follow me on Pinterest, Facebook and YouTube for more delicious updates. Your support truly means everything to me.